
When it comes to DIY electrical projects or professional installations, adjustable electrical boxes are a game-changer. These versatile boxes are designed to simplify installations and accommodate various wall depths, ensuring your outlets and switches sit flush and function seamlessly. However, to get the most out of these innovative boxes, proper use of their adjustable screws is essential. Here’s a step-by-step guide to help you achieve a flawless installation.
Understanding Adjustable Electrical Boxes
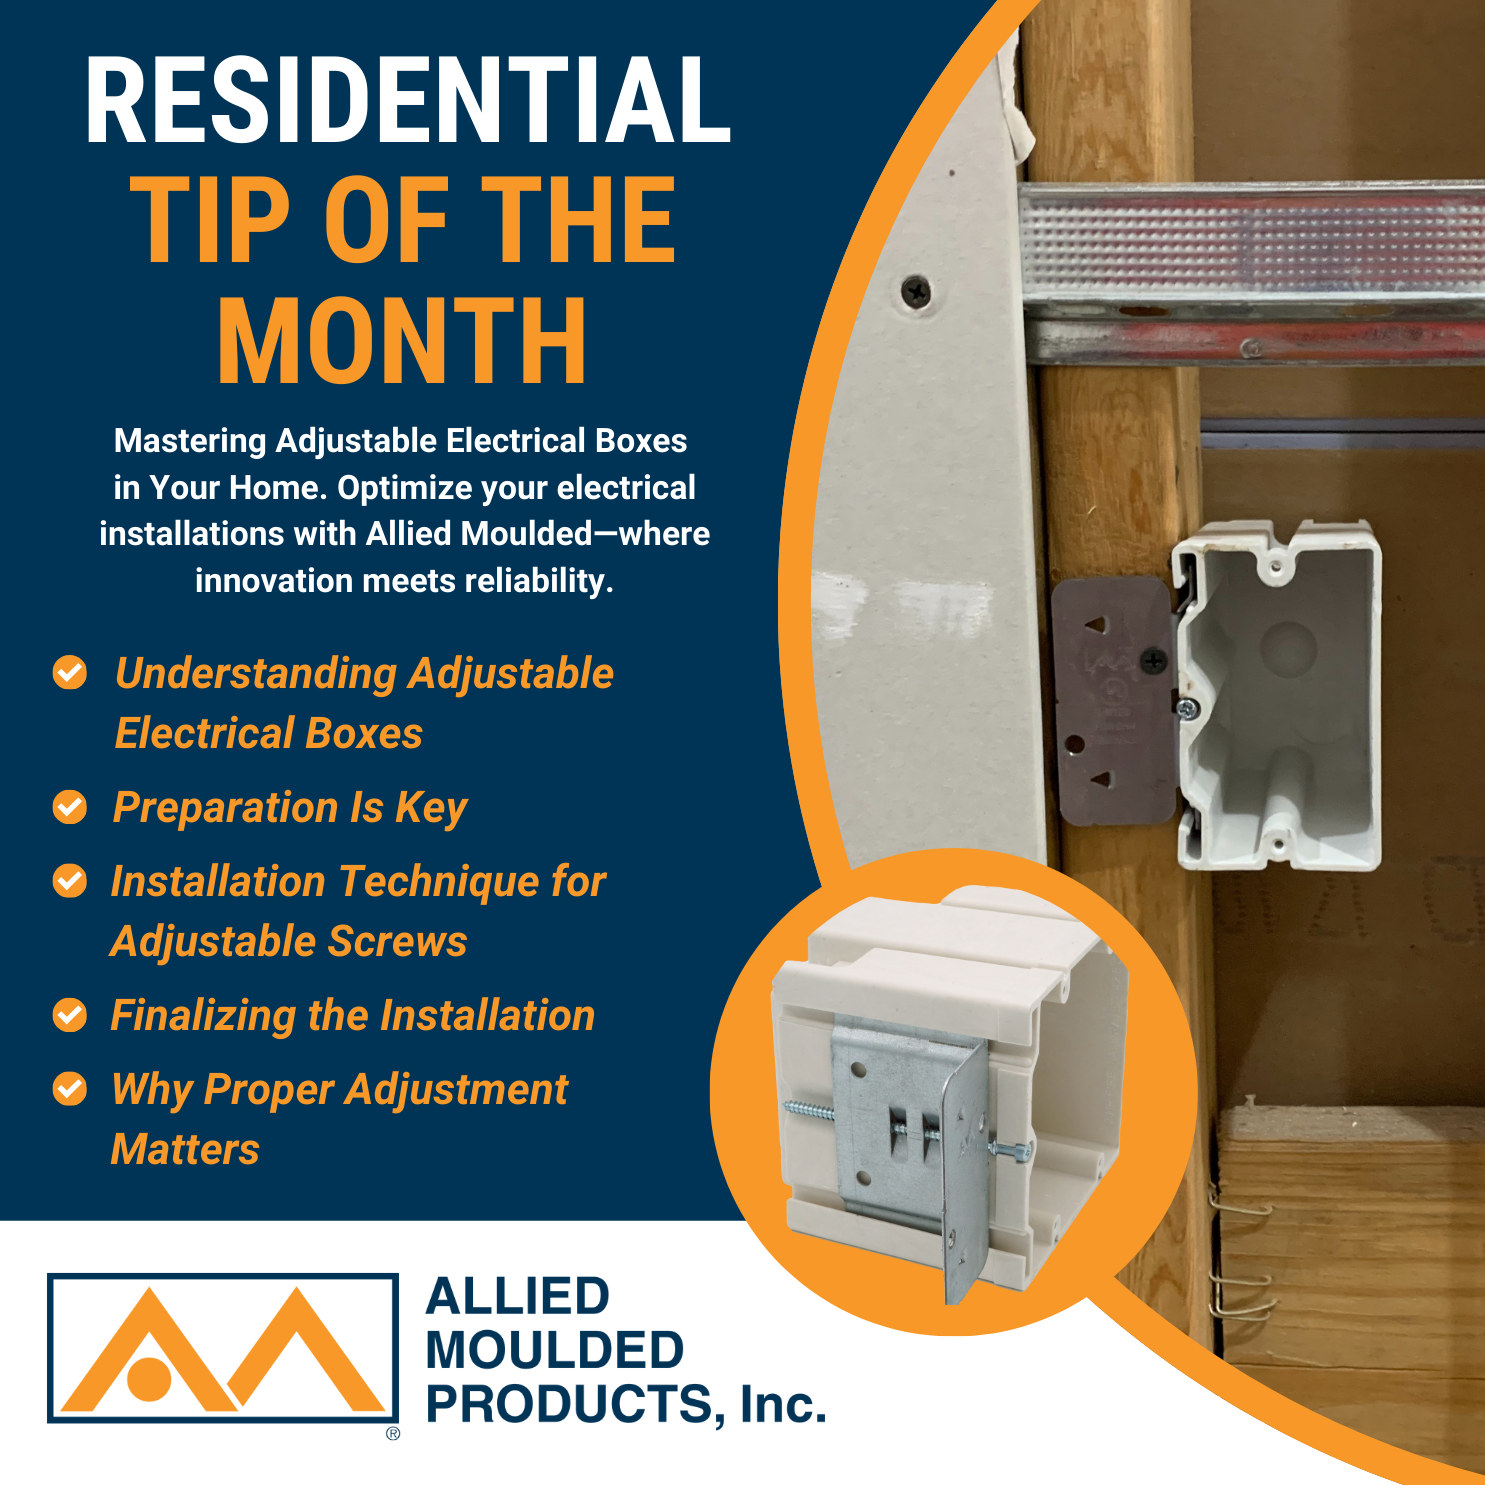
Adjustable electrical boxes allow for precise positioning of outlets and switches within walls, accommodating differences in wall thickness or surface materials. Their standout feature is the set of screws that let you adjust the box’s depth after installation. This adjustability is especially useful in remodels or when working with non-standard wall finishes like tile, shiplap, or paneling.
Preparation Is Key
Before diving into installation, take the following steps to ensure success:
- Measure the Wall Depth: Use a tape measure to determine the total thickness of your wall, including drywall, plaster, or any additional surface material.
- Choose the Right Box: Select an adjustable box with a depth range that matches your wall measurements. Allied Moulded offers a variety of durable, non-metallic electrical boxes perfect for residential applications.
- Turn Off the Power: Safety first! Shut off electricity to the circuit at the breaker box before starting work.
Installation Technique for Adjustable Screws
The adjustable screws on these boxes are the secret to a smooth installation. Here’s how to use them properly:
- Secure the Box in Place
- Position the electrical box within the wall cavity, aligning it with your desired outlet or switch location.
- Use the mounting tabs or brackets to secure the box to the stud. Ensure it’s level before moving to the next step.
- Adjust for Wall Thickness
- Locate the adjustment screws on the front face of the box. These screws control the box’s depth within the wall.
- Using a screwdriver, turn the screws clockwise to move the box outward or counterclockwise to move it inward. Adjust slowly to avoid overextending the screws or damaging the box.
- Check for Flush Alignment
- Once the box is adjusted, use a straight edge or level to confirm that the front edge of the box is flush with the wall surface. This alignment ensures a clean finish when installing the outlet or switch cover plate.
Finalizing the Installation
After achieving the perfect alignment, run the necessary wiring into the box and secure it according to code. Attach the outlet or switch, then install the faceplate. Finally, restore power to the circuit and test the functionality of your installation.
Why Proper Adjustment Matters
Misaligned electrical boxes can lead to various issues, such as:
- Improper Faceplate Fitting: A box that’s too recessed or extended will cause gaps or uneven cover plates.
- Code Violations: Electrical codes often require boxes to sit flush with the wall for safety and aesthetic reasons.
- Inconvenient Repairs: Fixing an improperly adjusted box after installation can be time-consuming and costly.
Conclusion
Adjustable electrical boxes are a versatile solution for ensuring safe, code-compliant, and aesthetically pleasing installations in your home. By mastering the use of adjustable screws, you’ll save time and frustration while achieving professional-grade results.
For durable, high-quality adjustable electrical boxes, explore Allied Moulded’s range of products designed for residential applications. With thoughtful features and reliable performance, these boxes are an essential addition to any electrical project.
Optimize your electrical installations with Allied Moulded—where innovation meets reliability.