
Safety can never be an afterthought—especially with electrical systems on an active construction site. Yet with hectic schedules, shifting priorities, and multiple trades under one roof, consistent safety procedures sometimes slip. That’s where a simple, repeatable 5-step safety drill shines. Focused specifically on electrical enclosures, it walks crews through daily or weekly checks that pinpoint hazards before they escalate. Below is a clear blueprint to keep your jobsite in compliance and your team out of harm’s way.
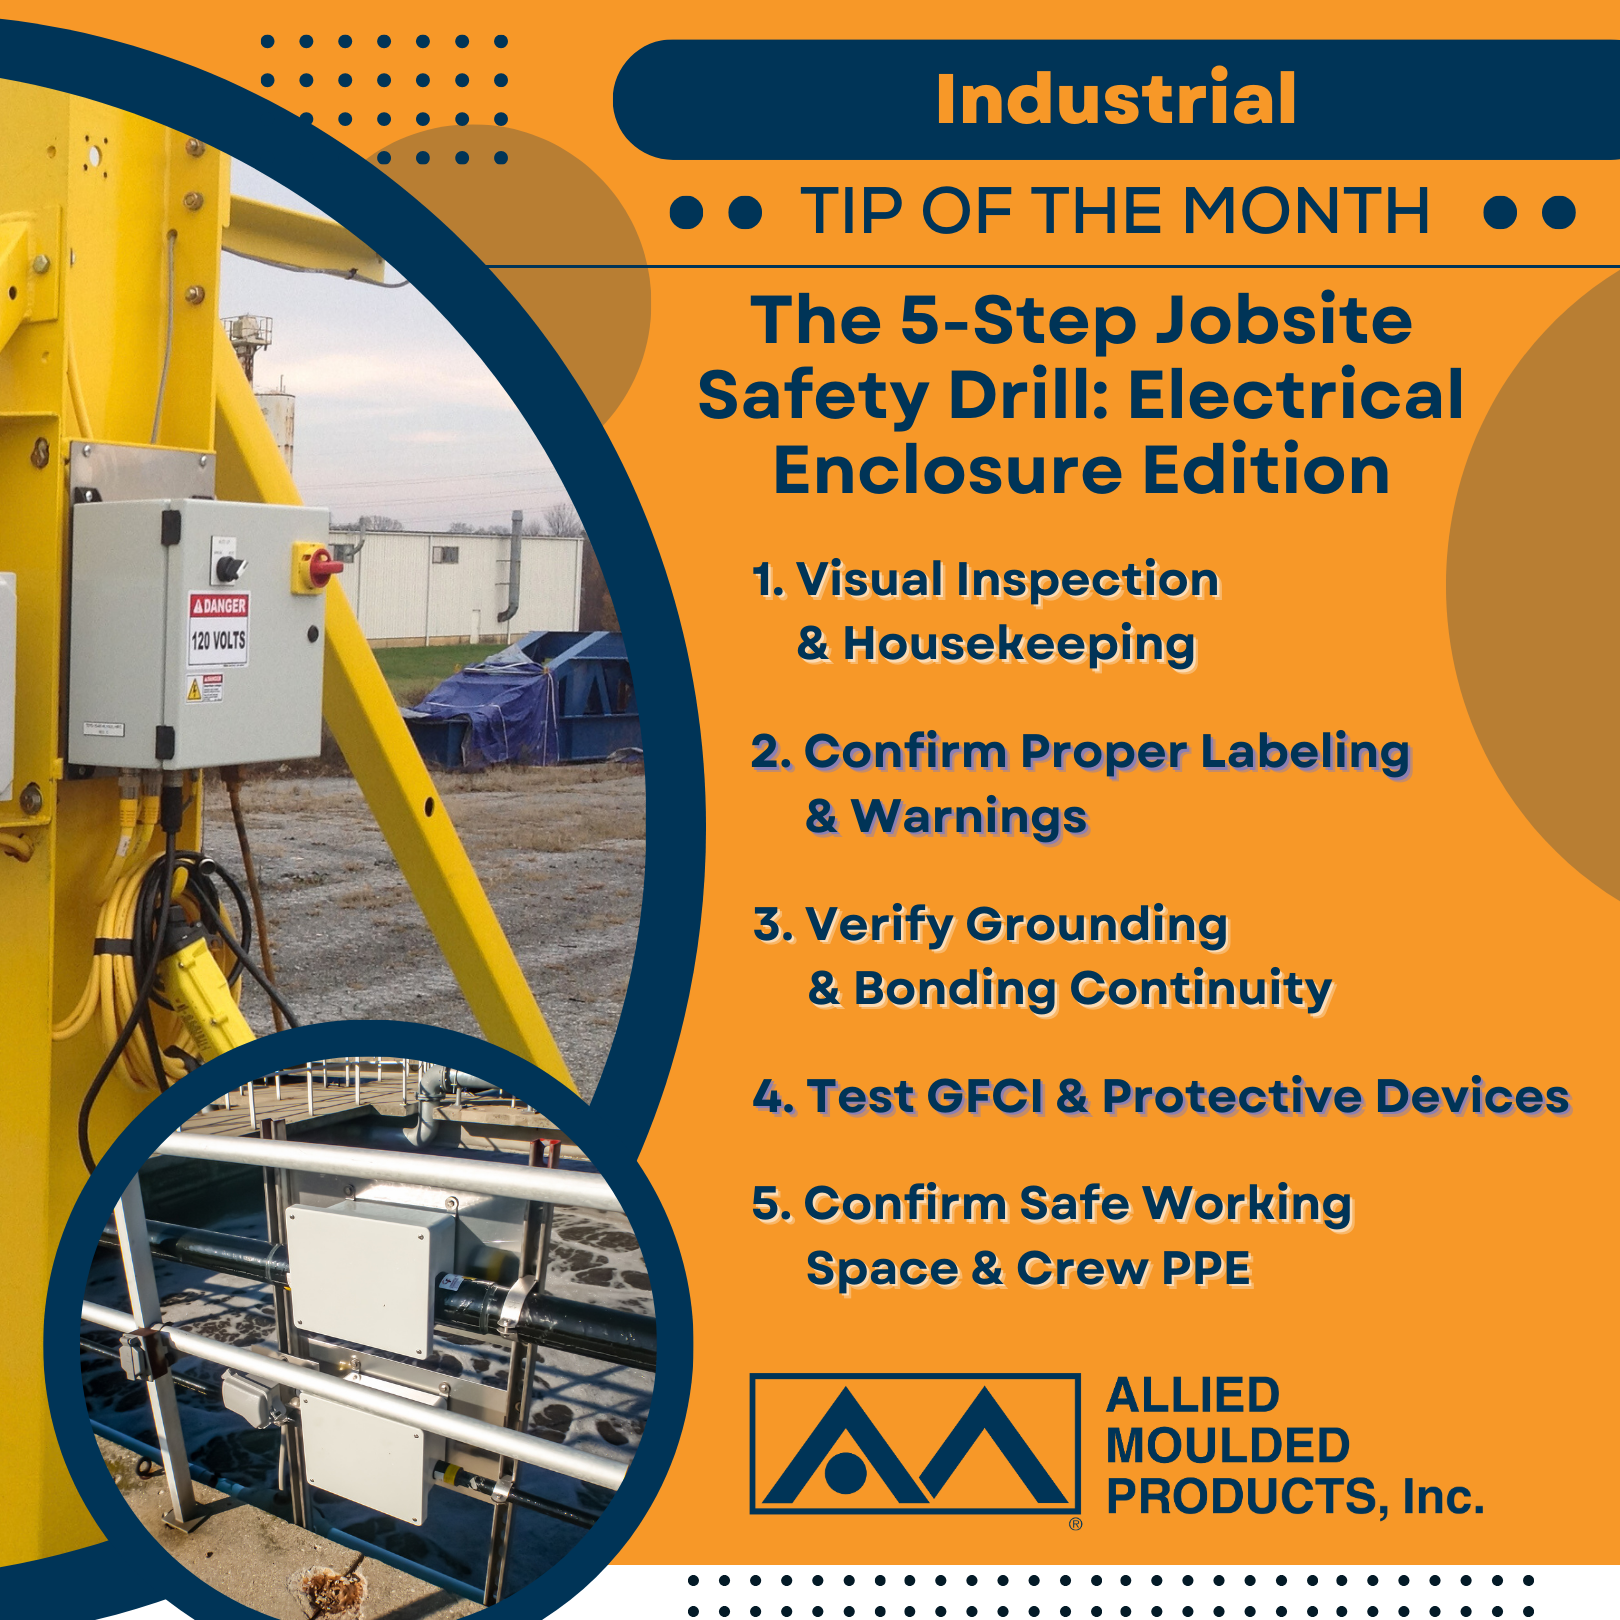
- Visual Inspection & Housekeeping
A quick scan can reveal major red flags:
- Enclosure Condition: Check for cracked or damaged walls, missing hinges, or rust. Fiberglass enclosures hold up well against corrosion, but always examine gaskets for warping or tears.
- Surrounding Clutter: Clear away debris, tools, or leftover material that clogs the recommended working space. NEC 110.26 is explicit about needing safe clearance for any servicing or emergency shutdowns.
- Documentation: If something’s off—like a partially open enclosure door—note it immediately in a safety log and fix it before energizing the circuit.
A clean, clutter-free environment around enclosures also prevents accidental contact, especially when rush jobs push workers to stash tools wherever they see open floor space.
- Confirm Proper Labeling & Warnings
Arc flash, voltage ratings, and correct circuit designations aren’t just nice-to-have labels—they’re essential for code compliance and day-to-day crew safety:
- Arc Flash Labels: Ensure hazard boundaries and incident energy levels are clearly posted. If your enclosure lacks space for the required data, consider an external label holder or an enclosure model designed with label-friendly surfaces.
- Equipment Identification: Each enclosure or panel should be labeled with a distinct name or number. Crews must know precisely which circuits they’re working on.
- GFCI/AFCI Markings: If the enclosure houses ground-fault or arc-fault devices, mark them. Doing so helps your team quickly spot protective elements during routine checks.
Well-displayed labels prevent confusion. In emergencies, every second counts; incorrectly labeled gear can be a life-or-death matter.
- Verify Grounding & Bonding Continuity
Even the sturdiest enclosure won’t help if it’s improperly bonded or grounded:
- Inspect Lugs & Jumpers: Ensure all metal or conductive parts are correctly bonded, per NEC Article 250. For fiberglass enclosures, check that any metallic accessories (like latches or lock hasps) are appropriately connected to a bonding pathway.
- Check for Corrosion: Particularly in damp or corrosive settings—like coastal sites—bonding points can degrade fast. A quick test with a continuity meter confirms a solid connection.
- Record & Update: If you discover a missing or loose lug, fix it immediately and update the jobsite log. Unbonded metal can lead to dangerous voltage potentials, especially if a fault occurs.
Proper grounding also reduces the severity of an arc flash event or short circuit, giving workers an extra layer of protection.
- Test GFCI & Protective Devices
GFCI receptacles and breakers feature test buttons for a reason—using them can be the difference between a near-miss and a tragic accident:
- Routine Testing: Push the built-in “Test” button on each GFCI or AFCI circuit. If it fails, lock out the circuit until a replacement is installed.
- Surge Protective Devices: Check any diagnostic lights or service indicators. If your SPD shows a fault, investigate. Surges happen without warning, and the device might have taken a hit.
- Document Results: A quick pass/fail note for each device ensures accountability. If you’re a GC overseeing multiple teams, designate someone to compile these reports weekly.
This step is fast but invaluable—especially for circuits that power critical construction tools or temporary lighting systems.
- Confirm Safe Working Space & Crew PPE
No matter how perfect the enclosure condition is, you risk code violations and possible injuries if workers lack personal protective equipment or enough elbow room.
- Working Space Check: Re-verify that boxes, ladders, or rolling carts haven’t encroached on the clearance zone. This is often the first area to become a “storage nook” when trades get busy.
- PPE Verification: Remind your crew that arc-rated clothing, insulated gloves, safety glasses, and hearing protection aren’t optional for live work. If the enclosure is locked out and tagged out, ensure that process is up to snuff.
- Final Sign-Off: A designated foreman or supervisor can sign off that the enclosure area meets code for the day. This extra step cultivates accountability: a quick signature or digital note encourages thorough checks rather than box-ticking.
Scaling the Drill
Larger or more complex projects might need daily checks, while smaller builds might suffice with weekly routines. Regardless of frequency, the method remains consistent. If each foreman implements these five steps systematically, your site’s accident risk falls dramatically, and you’re more likely to breeze through electrical inspections.
Benefits at a Glance
- Proactive Hazard Detection: Small cracks in an enclosure or mislabeled breakers don’t stay hidden until a big incident occurs.
- Reduced Project Delays: A safe, code-aligned site passes inspections faster and avoids last-minute drama.
- Crew Empowerment: Workers perform better when they see clear safety protocols. They feel protected and valued, boosting morale and productivity.
Allied Moulded’s Role
At Allied Moulded, we design enclosures that make these five steps easier to execute:
- Durable Fiberglass: Lightweight, corrosion-resistant materials that help stave off structural cracks or rust.
- Pre-Engineered Label Spaces: Smooth surfaces for arc flash or hazard decals, reducing guesswork.
- User-Friendly Latches: Simplify daily or weekly checks, so the door is easy to open and secure, keeping dust or moisture out.
Crews can focus on real safety measures rather than fighting with subpar hardware. Allied Moulded’s engineering and product teams are always available for consultation, whether you need custom hole placements or pre-installed features to streamline on-site routines.
Conclusion
Implementing a 5-step jobsite safety drill around your electrical enclosures isn’t just a best practice—it’s a project safeguard. From visual inspections and labeling checks to thorough GFCI tests and ensuring proper PPE usage, this repeatable procedure can drastically reduce incidents, keep you code-compliant, and improve overall jobsite workflow. By pairing these drills with robust enclosure solutions, you’re setting your entire team up for success, day after day.
Small steps, done consistently, reap big results. Commit to it now, and watch your jobsite evolve into a safer, more efficient environment—one enclosure check at a time.